Muntin Tips and Joining Tutorial
Share
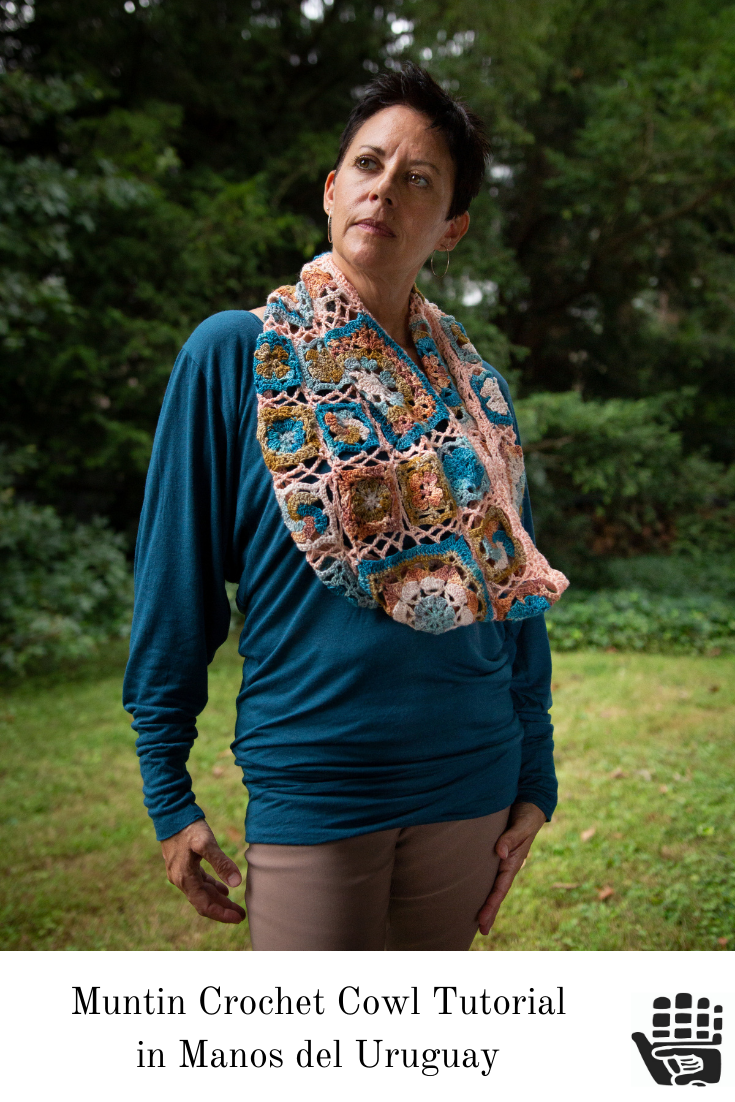
The Muntin pattern uses a Fino Mini-skein Set and a skein of Fino in an assortment of vintage-style motifs combined into a cowl or wrap. This crochet project is a fun way to play with color while building your skills.

Each project uses six different squares, two large and four small. The squares are worked individually in different color combinations, then joined together using the main color for the final round. The pattern includes tables to organize the colors used in each round and an assembly diagram to show the arrangement of the squares. This tutorial will show you the steps needed to assemble the first section of squares in the cowl.

The samples photographed for this post are a full skein of 427 Mourning and 05 Eleanor (413 Rosewater, 421 Havisham, 410 Pocketwatch, 420 Boudoir, 411 Garnet Brooch)

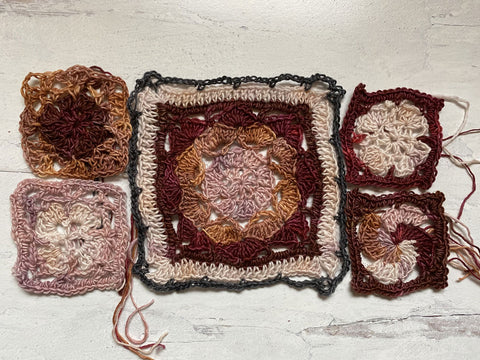
Here is our first Large square for the cowl before and after the last round is worked in the main color. This particular square is a foundation for joining the smaller squares.

The first section of the cowl is composed of one large square and four small squares. Here we have the small squares ready for their final round in the main color to join them.

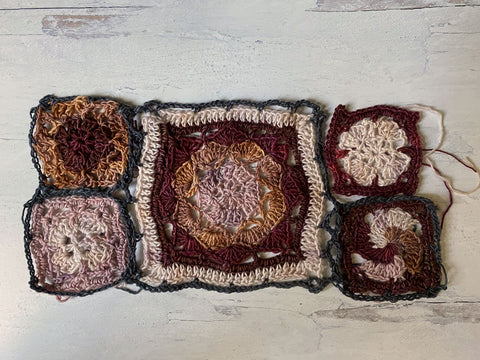
We will start in the lower left corner with the small square that needs to be joined onto one side of the Large square. The joins are made with a few slip-stitches where the edges meet.

The final round of the upper left corner square requires two side joins: one to the Large square and one to the small square beneath it.

Next, the lower right corner is joined on one side to the Large square.

The final round of the upper right corner square also requires two side joins, as we did on the left side. This completes the first section of the cowl; there are seven sections total. In each section the placement and color combinations differ from the previous one. After all the sections are complete and assembled, you’ll work two rounds in the main color around each outer edge.
Extra tips
- A few of the squares are a bit fiddly due to the color changes, so we encourage you to take each one one stitch at a time!
- You may find it easier to make all of the squares first, in each of their color combinations (but without that final joining round), but you’ll want to be sure and label them for ease of placement and following the pattern layout.
- You may find it helpful to mark up your pattern with highlighters or markers to help you identify where the pattern rounds switch between the contrast colors.
- Keep crocheting! The squares work up fairly quickly when you don’t stop to admire your work after each round.
- It is the crocheter’s choice on weaving ends as you go; if you prefer, you can weave in ends a few sections at a time, or save them for the end.
- Plan to block! Blocking will even out any wonky stitches and join spots.
Which colors would you choose for a Muntin of your own? We’d love to see your hooks in action and encourage you to share your photos with us on Facebook, Ravelry, and Instagram!

